
WooCommerce turns a WordPress site into a shop. You can add it in five places, and every one of them does the same thing: it installs WooCommerce and sets the shop up for you, so the site is ready to sell. On your PBN hosting it is free.
💡 Which one should I use?
Adding a new site? Tick it on the add-site form (or add a column to your CSV). Already have the site? Press the button on its page. Want the shop on its own, separate hosting? Take a money-site WordPress plan with the tick. Automating? Use the API or MCP parameter.
What gets installed and set up
Wherever you add it, WooCommerce is installed, activated and set up the same way:
- the Shop, Cart, Checkout and My account pages are created;
- the store is open – not left in WooCommerce’s “coming soon” mode;
- the WooCommerce setup wizard is skipped, so it does not block your admin;
- pretty permalinks are switched on if they were off (WooCommerce needs them for product and cart addresses);
- a currency is set if none was, which you can change in a second.
What we deliberately leave to you: your products, your payment method (for example PayPal or a card processor) and shipping. Those are business decisions, so we never guess them.
It usually takes one to two minutes once WordPress is there. We e-mail you when the shop is ready, and the site’s WooCommerce card shows it.
1. On the add-site form
- Press Add site on your sites list.
- Choose WordPress as the type.
- Tick Install WooCommerce – fully set up and ready to sell (free). It only appears while the type is WordPress.
- Fill in the rest as usual and press Create.
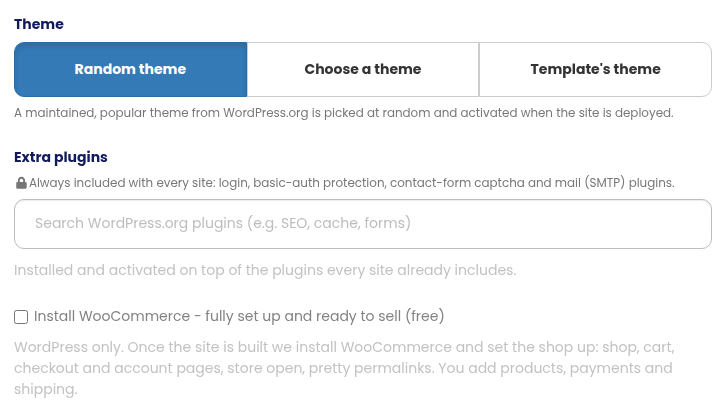
WooCommerce is installed as soon as the site’s first deploy has finished – usually a few minutes after you press Create. Until then the site’s WooCommerce card says it is waiting for the deploy.
2. In a bulk upload (CSV)
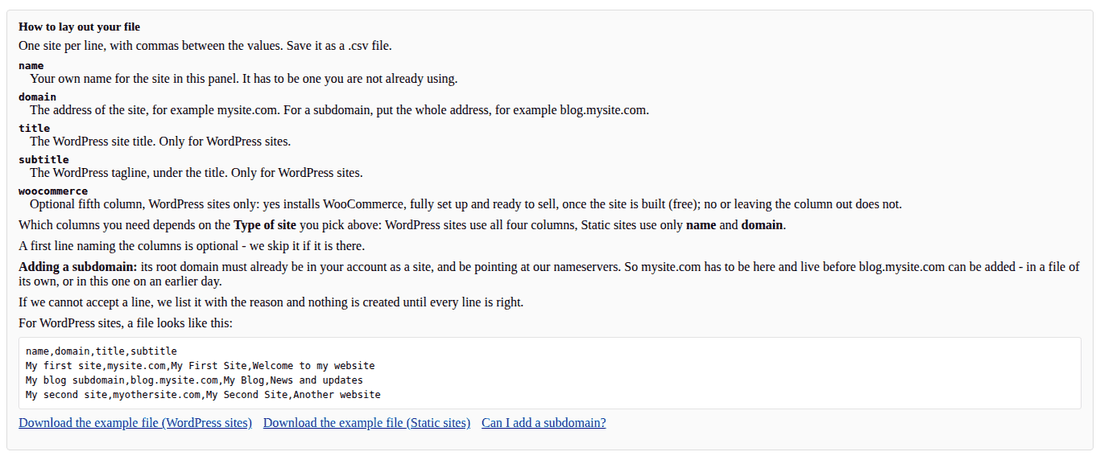
On Bulk site creation, a WordPress file can have an optional fifth column, woocommerce, with yes or no on each line:
name,domain,title,subtitle,woocommerceMy shop,myshop.com,My Shop,Everything we make,yesMy blog,myblog.com,My Blog,News and notes,no
Lines with yes get WooCommerce after their first deploy, exactly as with the tick. Leave the column out and nothing changes. It is for WordPress files only; any value other than yes or no is refused with its line number, and nothing is created until every line is right.
3. On an existing WordPress site
- Open the site from your sites list.
- Find the WooCommerce card and press Add WooCommerce (free).
- Wait a minute or two – you can close the page. We e-mail you when the shop is ready.
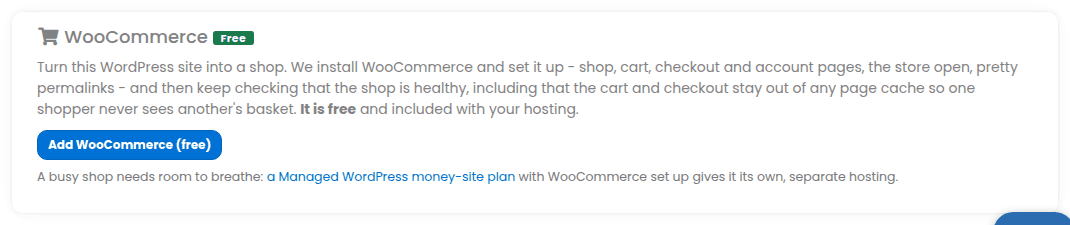
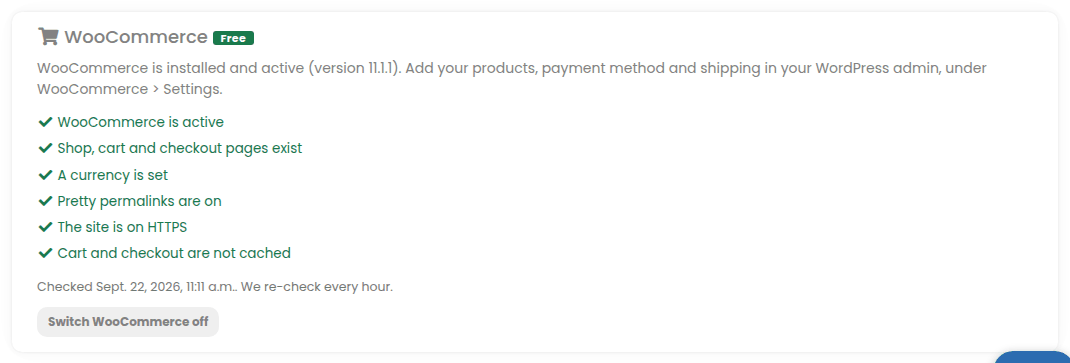
Once WooCommerce is installed the button is gone and the card shows the shop’s health checks instead, re-checked every hour: WooCommerce active, the shop pages present, a currency set, pretty permalinks, HTTPS, and the cart and checkout kept out of any page cache (so one shopper never sees another’s basket). Switch WooCommerce off deactivates it and keeps your products and orders in the database.
The card appears on every kind of site. On a Joomla, Drupal, PrestaShop, OpenCart, Grav, MediaWiki, PHP hosting or static site it explains that WooCommerce is a WordPress plugin and points you to a WordPress site with the tick instead.
4. On a money-site WordPress plan
Money-site hosting runs your shop on separate infrastructure from the PBN network. Every Managed WordPress plan – WordPress Starter, WordPress Plus and WordPress Pro – has the same tick:
- Open Money-site hosting › WordPress in the menu.
- Choose the term and the plan (Plus or Pro for a busy shop).
- Tick Install WooCommerce – fully set up and ready to sell.
- Add your domain if you have one and press Continue to payment: pay by card, PayPal or crypto, on Zinn Digital LTD’s own secure page.
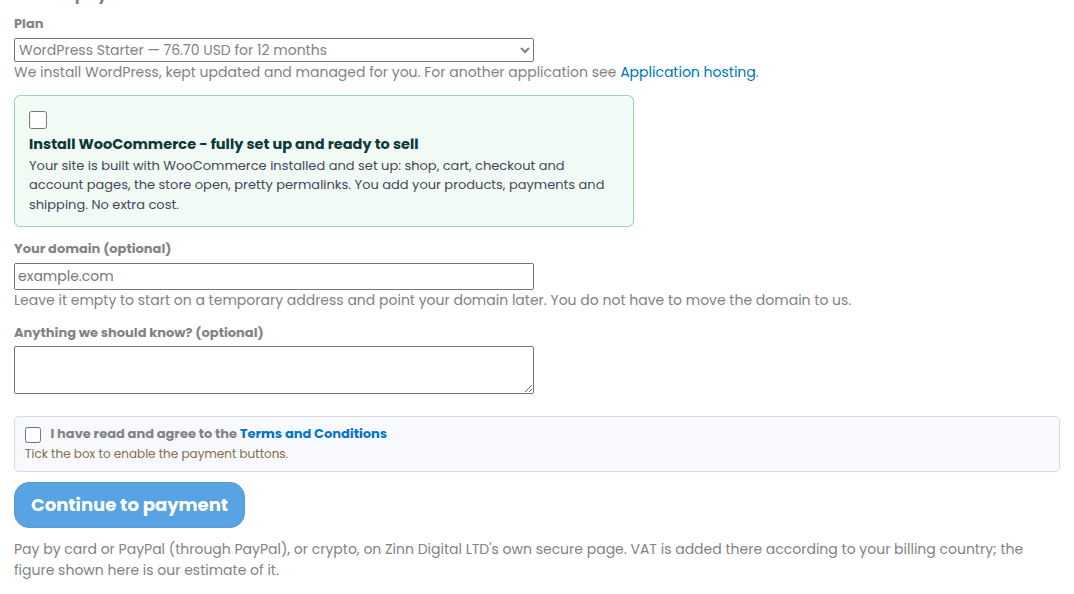
The site is built with WooCommerce already set up. There is no separate WooCommerce plan any more – a WordPress plan with the tick is the shop plan. See Money-site hosting.
5. With the API or MCP
- New PBN site: send
install_woocommerce: truewithPOST /sites(MCP toolsites_create). WordPress only; it is installed after the first deploy. - Existing PBN site:
POST /sites/{id}/woocommercewithon: true(MCPmoneysites_woocommerce_set);GETthe same address for its state and health checks. - Money-site order:
woocommerce: trueonPOST /money-sites/orderswith a WordPress plan code (MCPmoneysites_buy).
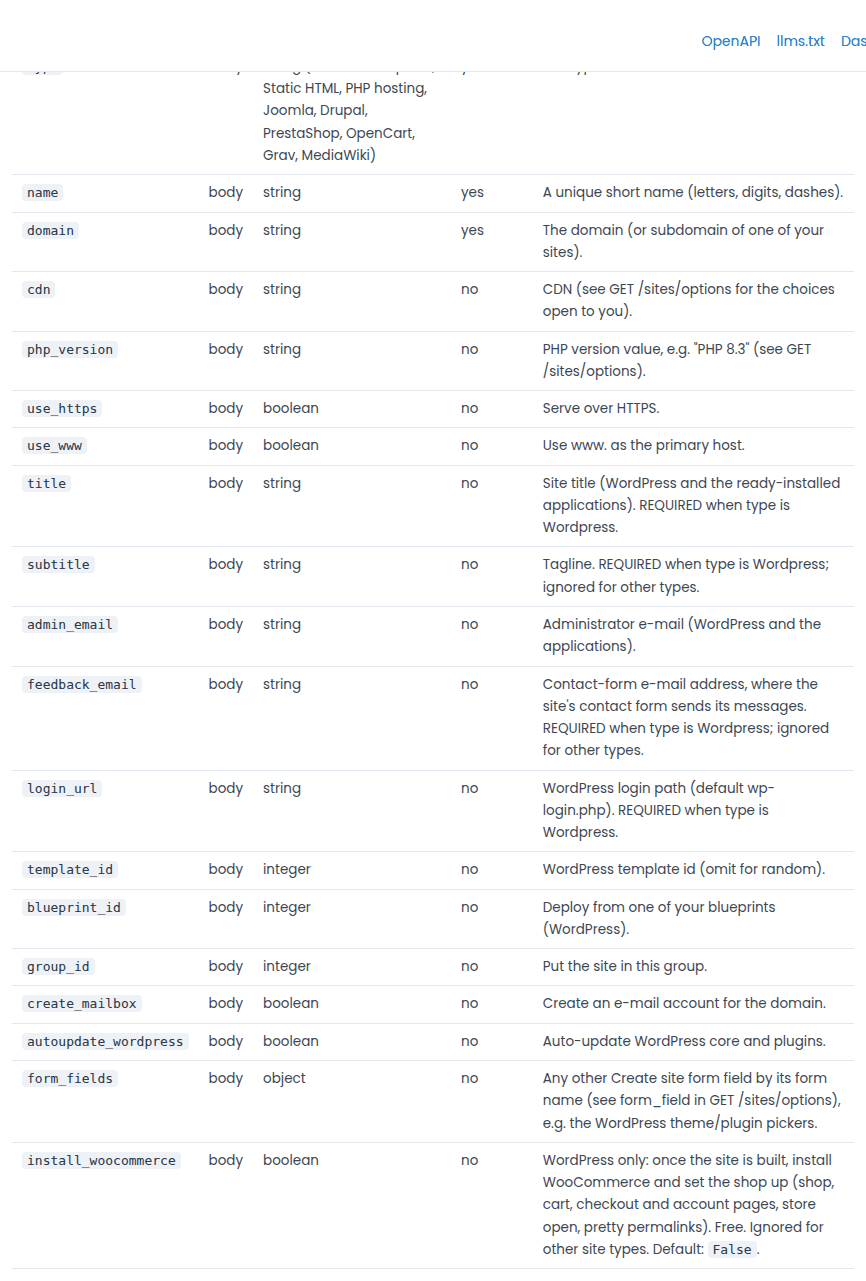
The full reference is in your dashboard at API docs.
What to do next
- Log in to WordPress (the Admin button on the site gives you one-click login).
- Go to WooCommerce › Settings: check your store address and currency.
- Under Payments, switch on the way you want to be paid.
- Under Shipping, add your zones and rates (or mark products as virtual).
- Add your first products under Products › Add new, and place a test order.
Questions
- Is it really free? On your PBN hosting, yes – WooCommerce and the setup cost nothing extra. On a money-site plan the tick costs nothing extra either; you pay for the plan.
- How long does it take? One to two minutes once WordPress is installed. For a new site, add the time its first deploy takes.
- Will it change my theme or content? No. It adds the four shop pages and leaves everything else alone.
- Can I switch it off? Yes, on the site’s WooCommerce card. Products and orders stay in the database.
- Why can’t I tick it on my Joomla or Drupal site? WooCommerce is a WordPress plugin. Add a WordPress site with the tick instead.
- It says it failed. The card says why; press the button again, or open a ticket and our team will look.