
You can add and manage your own DNS records for any domain directly from your dashboard — no need to open a support ticket. The panel supports A, AAAA, CNAME, TXT, MX, SRV, CAA and NS records, and on Cloudflare‑fronted sites you can switch the orange cloud (CDN proxy) on or off for each record. Any change you make here is published to your CDN provider automatically and starts resolving shortly after.
💡 Heads-up: Records you add, edit or delete are pushed to your CDN provider within a few seconds. The platform never overwrites or removes records you’ve created, and any records you add directly at your CDN provider are left alone too.
Which records you can add
From the DNS panel you can create, edit and manage any of the following record types:
| Type | What it’s usually used for |
|---|---|
| A | Points a name to an IPv4 address |
| AAAA | Points a name to an IPv6 address |
| CNAME | Points a name to another host name |
| TXT | Verification and email records (SPF, DKIM, DMARC, ownership checks) |
| MX | Directs email to your mail servers |
| SRV | Points a service to a specific target and port |
| CAA | Controls which authorities may issue SSL certificates |
| NS | Delegates a subdomain to other nameservers |
Adding a custom DNS record
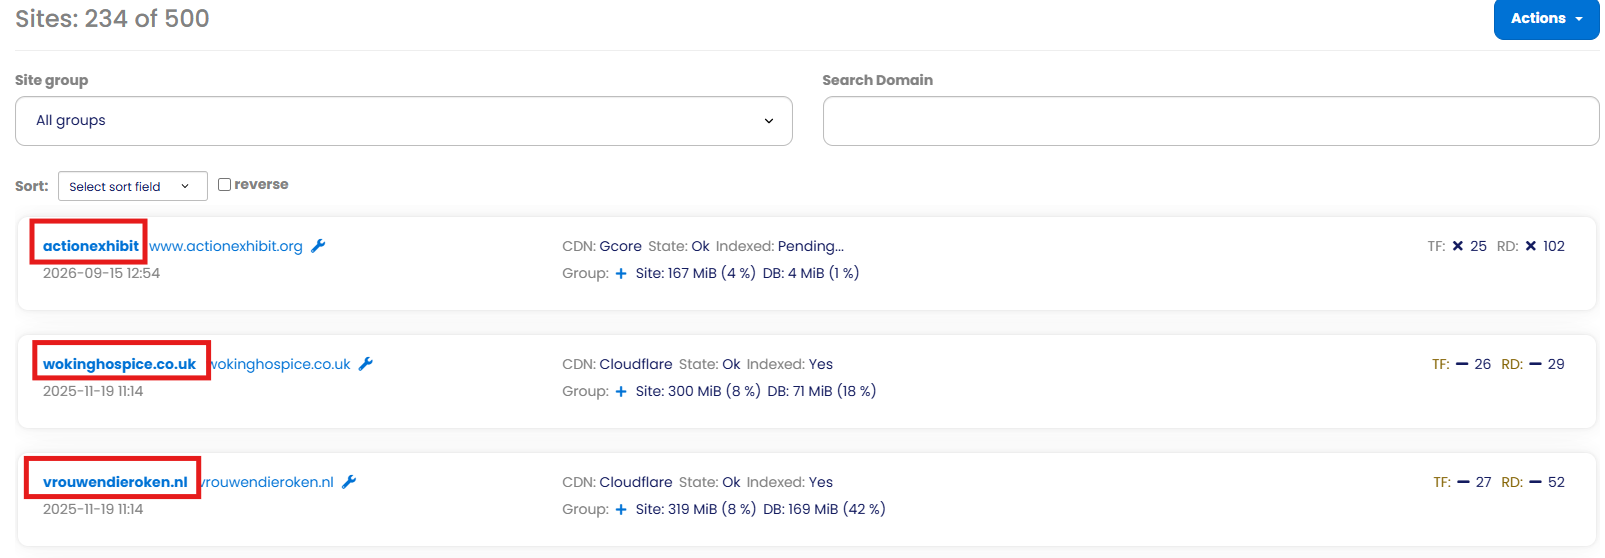
1. Open the site from your dashboard
In your main dashboard, click the site name of the domain you want to work on. This takes you to the main overview screen for that domain.
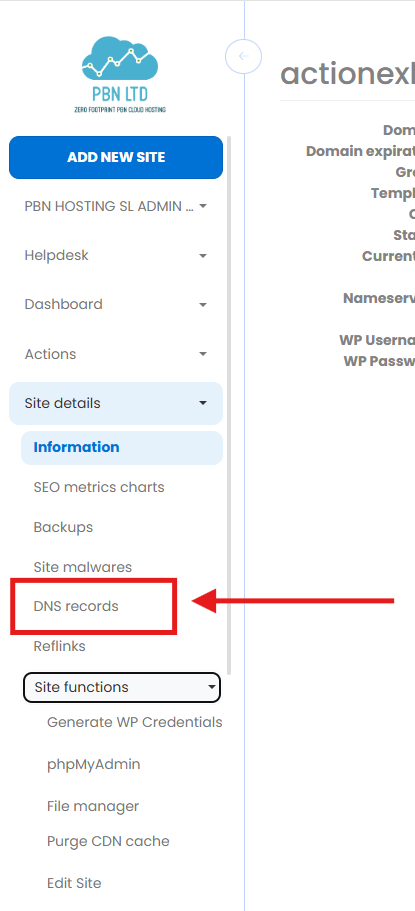
2. Open the DNS Records screen
In the left-hand menu you’ll find all the tools and features for that domain. Under Site details, click DNS records.
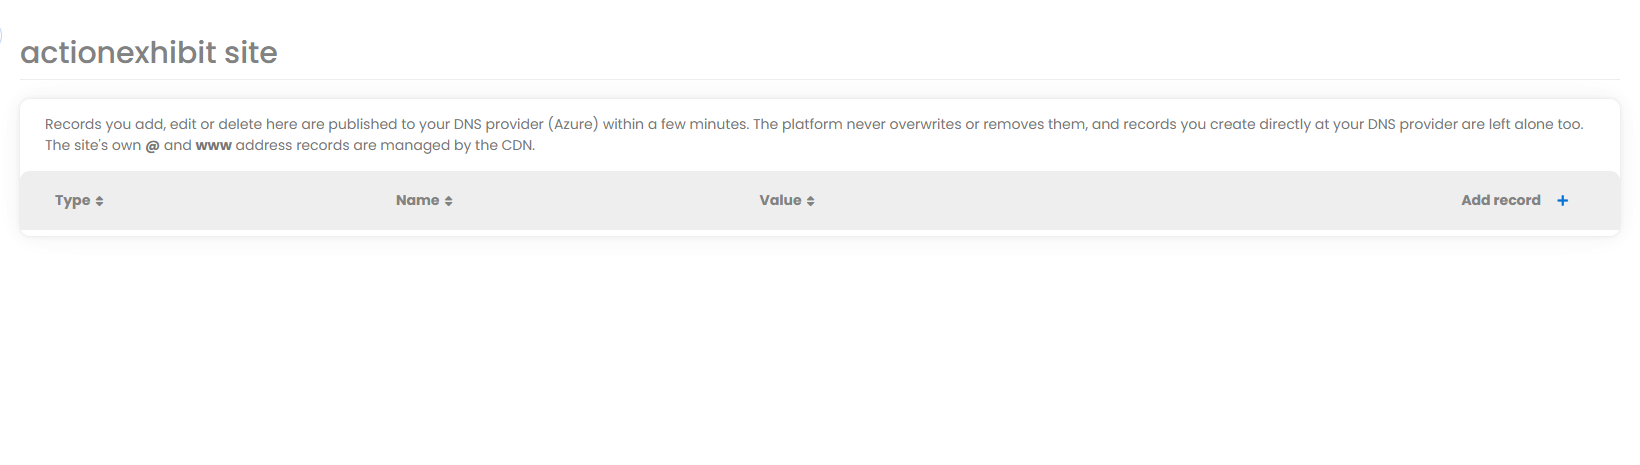
3. Review your existing records
This screen lists your current records and lets you manage, edit and add new ones. When you’re ready to add one, click Add record in the top‑right corner.
4. Choose the type and enter the details
In the pop-up, use the Type dropdown to pick the record you want to add. Then set the Name — use @ for the root domain, or a label such as blog or _dmarc for a subdomain or prefix — and enter the Value (the IP, host name, or text the record should hold).
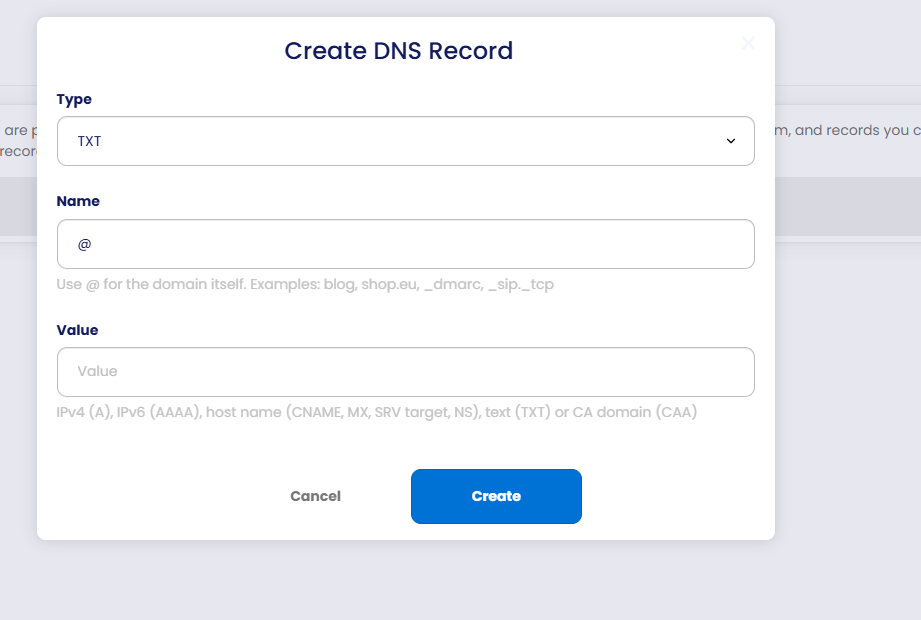
5. Click Create
Once your details are in, click Create. The record automatically syncs into the CDN and begins to resolve.
⚠️ You can’t add an A record for the root domain. This is blocked on purpose — an A record for the root domain already exists by default (the site’s own @ and www address records are managed by the CDN). This is standard platform behaviour and can’t be changed.
Cloudflare sites: the orange cloud (CDN proxy)
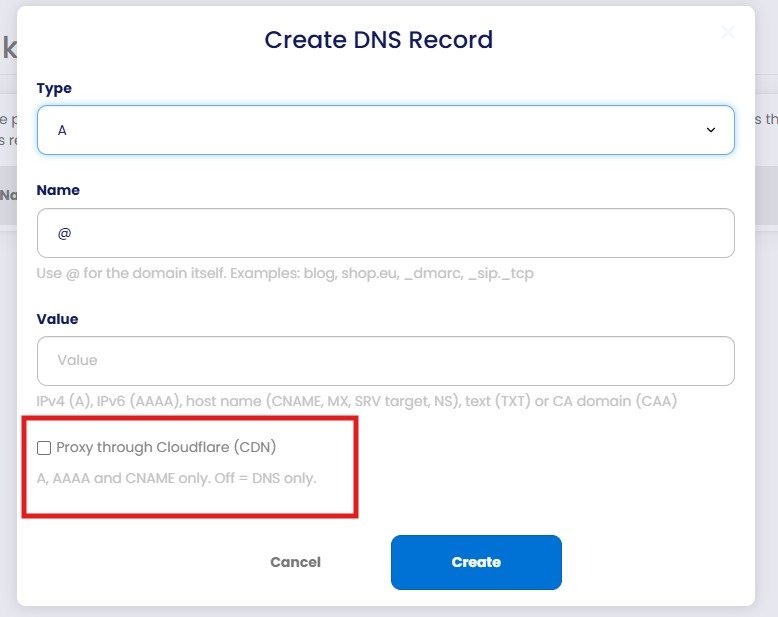
If your domain uses Cloudflare as its CDN, the Create/Edit pop-up shows an extra option: Proxy through Cloudflare (CDN) — the “orange cloud”. You can switch this on or off for each record.
It applies to A, AAAA and CNAME records only. Leave it on to route the record’s traffic through Cloudflare’s CDN, or turn it off for DNS-only (the record resolves straight to its value with no proxying).
When your record will resolve
Your change reaches your CDN provider within a few seconds. From there it needs to propagate across the internet before it resolves everywhere.
✅ Quick summary: DNS records can take up to 24 hours to resolve globally, though in most cases they’re live within a few hours.
Related articles