
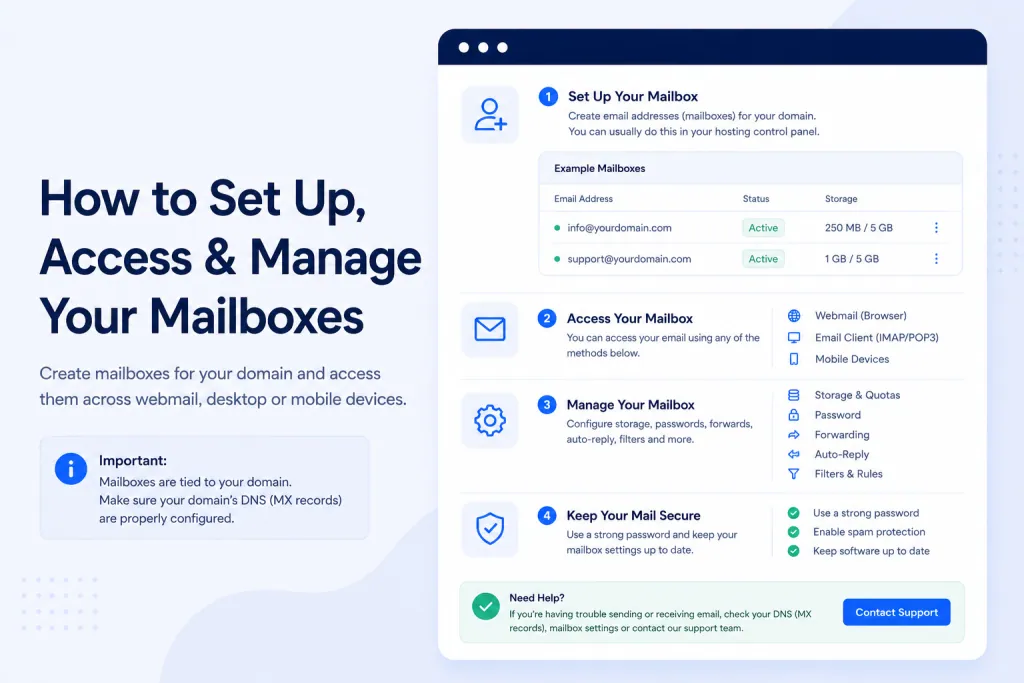
Short answer: every PBN LTD site can have its own email at your domain — real mailboxes you read and send from (webmail included), plus reliable sending for the mail your website itself produces (contact forms, password resets, order confirmations). You can switch email on when you first add the domain, or add it any time afterwards from the Mail section.
💡 Heads-up
Email is optional — but if your site sends anything (contact forms, orders, password resets), a mailbox at your own domain makes that mail far more likely to reach the inbox. You can add one whenever you like; you don’t have to decide the moment you create the site.
Do I need an email account?
You don’t have to set one up. Here’s the difference:
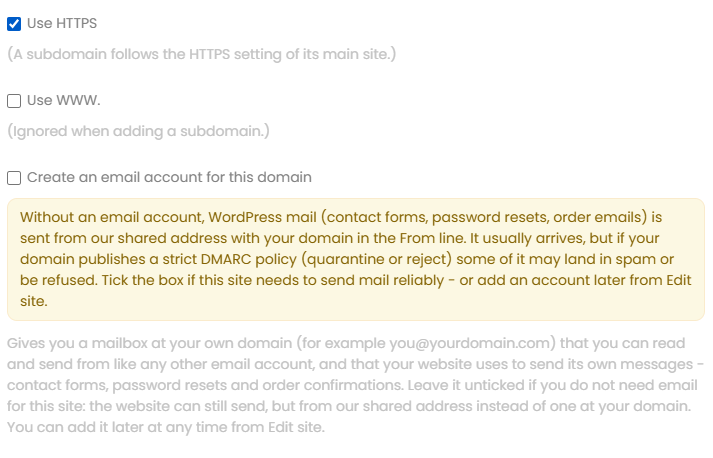
- Without an email account — your website can still send mail (contact forms, password resets, order emails), but it goes out from our shared address with your domain in the From line. It usually arrives, but if your domain publishes a strict DMARC policy some of it may land in spam or be refused.
- With an email account — you get a real mailbox at your own domain (for example you@yourdomain.com) that you read and send from like any other inbox, and your website sends its own mail from your domain too.
If your site takes contact-form messages or runs a shop, we recommend setting one up.
Two ways to get a mailbox
Option 1 — Tick the box when you add the domain
On the Add site screen, tick Create an email account for this domain. That’s the quickest way — your mailbox is ready as soon as the site is set up.
Option 2 — Add one later from the Mail section
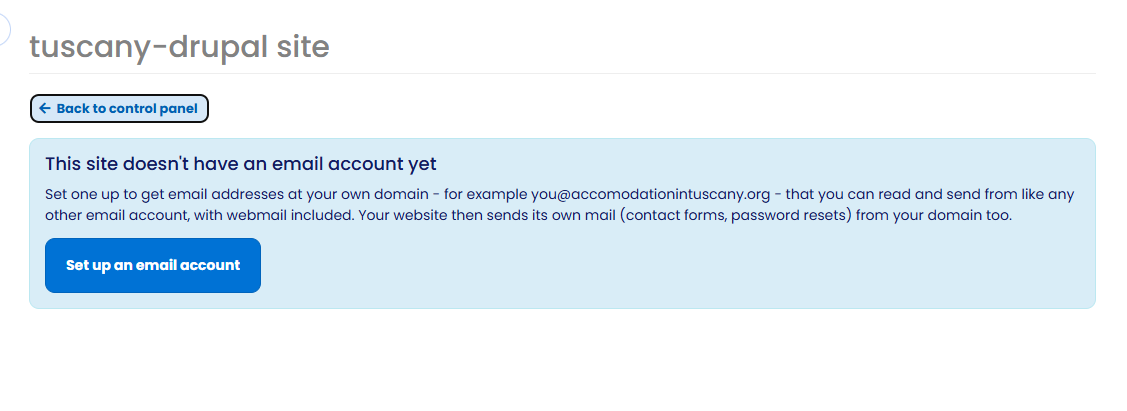
Didn’t tick the box? No problem. Open the Mail section for the site (see below) and, if there’s no account yet, you’ll see a Set up an email account button. Click it and your mailbox is created.
Opening the Mail section
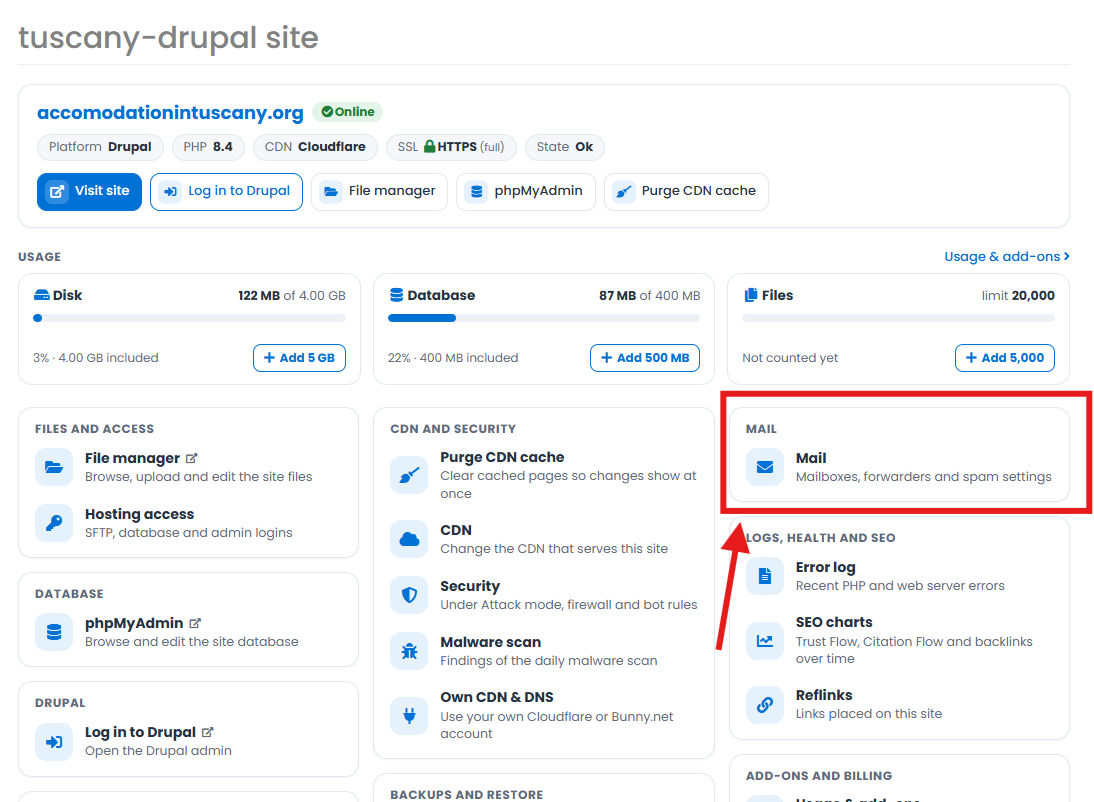
There are two ways to reach a site’s email settings. First, open the site from your dashboard (click its name) to land on its Control panel. Then either:
- Click the Mail card (Mailboxes, forwarders and spam settings), or
- Use the left-hand menu under Site details → Mail.
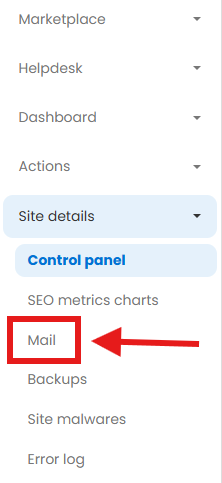
Creating a mailbox
Inside the Mail section, the Mailboxes panel is where you add and manage addresses. To create one, fill in the Add mailbox row:
- Name — the part before the @ (for example info, sales or you). Your domain is added automatically.
- Mailbox size — the storage limit in MB. The default is fine for most people; raise it for a busy inbox.
- Password — at least 10 characters. Use a strong, unique password.
- Click Add mailbox. The new address appears in the list straight away.
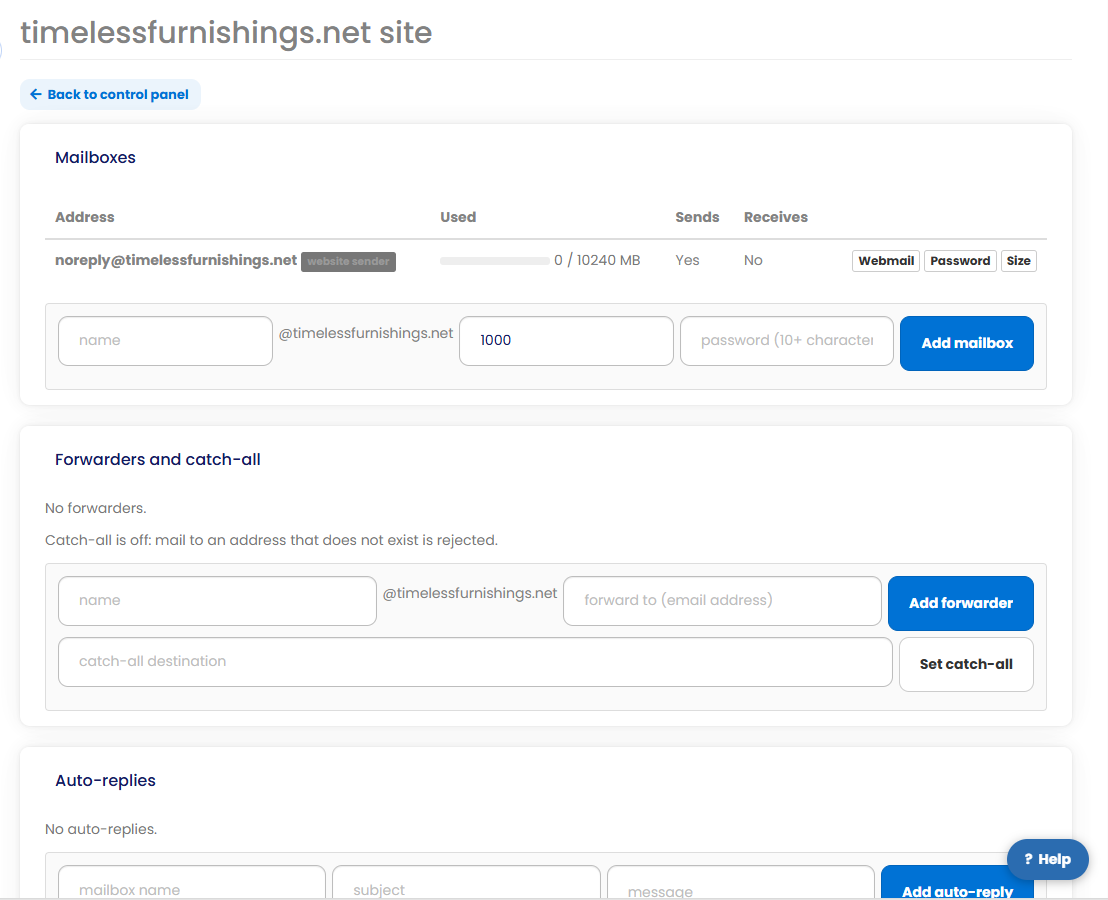
You’ll also see a noreply@ address marked website sender — that’s the mailbox your website uses to send its own mail. It sends but doesn’t receive, so leave it in place.
💡 Tip:
Each mailbox row has three buttons — Webmail (open the inbox in your browser), Password (reset it) and Size (change the storage limit). The Used, Sends and Receives columns show how full it is and what it’s allowed to do.
Accessing your email — Webmail & mail apps
The quickest way to read and send mail is Webmail: click the Webmail button next to any mailbox to open it in your browser — no setup needed.
Prefer Outlook, Apple Mail or the Gmail app? Connect your mailbox using the details in the Mail client settings section of the Mail page:
| Setting | Value |
|---|---|
| Username | Your full email address (e.g. you@yourdomain.com) |
| Password | The password for that mailbox |
| Incoming (IMAP) | imap.ntcloudhosting.com — port 993, SSL/TLS |
| Incoming (POP3) | imap.ntcloudhosting.com — port 995, SSL/TLS |
| Outgoing (SMTP) | smtp.ntcloudhosting.com — port 587, STARTTLS (log in with the same email and password) |
IMAP is recommended — it keeps your mail in sync across your computer and phone. Your exact settings are always shown in the Mail client settings section, in case they ever change.
Managing your mailboxes
The Mail page has a few more tools for keeping things tidy and deliverable:
📬 Forwarders and catch-all
A forwarder sends incoming mail for one address to another inbox you already use — handy if you want sales@yourdomain.com to land in your everyday email. Catch-all is off by default, so mail to an address that doesn’t exist is rejected; set a catch-all destination if you’d rather collect everything sent to your domain in one mailbox.
🔁 Auto-replies
Set an automatic reply (an out-of-office, say) for any mailbox — just enter the mailbox name, a subject and a message, then click Add auto-reply.
🛡️ Anti-spam and authentication
This is where you turn on DKIM signing and a DMARC policy. Both help other mail services trust email sent from your domain, and the records are published for you — so it’s essentially a one-click switch. Blocked and always-allowed sender lists are shown here too (contact support to change them).
📖 Delivery log
The Delivery log shows recent send and receive activity for your domain — a quick place to check whether a message actually went out.
💡 Getting mail to the inbox
If messages from your site or mailbox are landing in spam, turn on DKIM and DMARC under Anti-spam and authentication, and give brand-new mailboxes a little time — DNS changes can take a few hours to spread worldwide.
✅ Quick summary
Add email when you create a site (tick Create an email account) or later via Site details → Mail. In the Mail section you can add mailboxes (name, size, password), open them in Webmail or connect an app with the Mail client settings, and manage forwarders, a catch-all, auto-replies and DKIM/DMARC. Your website’s own mail sends from the noreply@ address.